
Do you want to learn how to start a blog and actually get paid for it? If so, then you’re in the right place. In current times, blogging has been seen as a very relevant and sometimes lucrative means of sharing all sort of news and information including topics such as sports, politics, technology, entertainment, science, fashion, pets, lifestyle, etc. Some people even create blogs simply to share details about their personal life experiences for readers to learn from.
I personally believe that anyone can create a successful, inspiring, and profitable blog if they’re willing to put in the work, remain dedicated and consistent, and always keep learning how to do things better. Starting a blog isn’t as difficult as it may seem. However, there are still a lot of people that do not know how to get started. Most of them end up spending a lot of money without achieving the desired result they need.
My decision to starting my online business and learning how to blog and begin making money from it (on the side of my full-time job), is what led me to building this platform and eventually helping others do the same. And in this post, I’m going to walk you through my easy to follow step-by-step instructions to starting an attractive and professional looking blog and getting readers to love your content. It will take a little work on your part and a very small amount of money, but if you dedicate the time now, you will be set on a path that can lead you in the direction you never thought was possible.
By creating an eye-catching blog right from the start, you’re setting yourself up for success. It will help you grow your traffic much faster, build trust with your audience, and ultimately create a thriving online business with a healthy income.
I’m here to help guide you through this. In this guide for beginners, I’m going to show you everything you need to know when it comes to learning how to start a blog and eventually profit from it. So, if you’re ready to take a leap and learn how to start a blog, let’s get into this simple, step-by-step guide.
Yes! This is one of the important things you need to do when you are starting your blog. Really think about why you want to start a blog and what you want to achieve. You need to be clear on your vision for your blog and have a solid idea of what you want to write about.
While figuring out the name you want to choose, ensure that the name is in line with your passions, the niche you aim to write about in your blog, and the very brand you aim to represent. Your blog topic has to be unique, and if possible, specific. A lot of readers may not get easily attracted to your blog if you have so many topics or details in one blog. Most people create blogs about fashion, technology, science, sports, etc. It is very important to identify which one works well for you and excel at it. In summary, write about the things you love.
For starters, try to brainstorm 10-20 post ideas before you get started to make sure that you’re going in the right direction and have enough to talk about on your chosen topic.
Now that you have your niche picked out…….great work. Let’s move on to the fun stuff. It’s time to choose your domain (site) name. This is very important. In order for people to know about your blog and read it, it has to be online. It should be something you like and something that relates to your niche, if possible. Mine is https://thenerdyceo.com. I love my domain name because it resonates with me as a person, my business brand, and my purpose for establishing this platform.
If you are sure that you are going to write about only one subject, then by all means pick a domain name that is very specific to your niche. However, if there’s a chance you would like to add more topics, it might be best to use a broader url. That way, it leaves it open for you to spread your wings without having to start a whole new blog. I do want to note that your url can be changed if you decide to change your mind.
Action Step: Write out a list of domain names you like and then do a search to see if it’s available. If the name is currently taken, there is really nothing you can do except to get a little creative. Try looking for synonyms of the word you were hoping to use. Trust me, after you start using a domain name for a while, it will start to feel like it was the name you were meant to have all along.
It is important to note that your domain name is not supposed to contain characters except a dash (-). If your desired extension (.com) has been taken, there are several other extensions that you can choose from. They are: .org, .co, .io, .co.uk, .co.us, etc. You can even choose a custom extension if you pay more.
Keep a short list of domain names and toss around which one you like best. Put some thought into this, but don’t let it paralyze you. Make a decision and move on to the next step which brings us to Web Hosting.
After choosing your domain name, the next thing you need to do in order to get your blog online is hosting. Hosting is the process of uploading your website or blog to a server. For those who intend to make money from their blog, it is very important that you pay for hosting.
I recommend using Bluehost for your hosting (that’s what I use with the Nerdy CEO). It’s very easy to launch your blog with their 1-click WordPress installation, and their customer service via phone or chat is excellent too.
BlueHost also has great plans that will help you get started in your hosting. If you intend to use WordPress.org (which we will discuss in the coming points), BlueHost comes in very highly recommended. It is simply the best hosting, and the beautiful thing about it is that it comes at an affordable price for beginners. Like we stated earlier, BlueHost gives you a free domain (.com) for the first year.
A Note about Costs: Having your site self-hosted will cost you a little bit of money. Sort of think of it as an investment for your business. This is a small price to pay to get your own business started. It’s an investment that can pay off over and over again if you put in the work.
Bluehost is the largest WordPress hosting company and are trusted by millions of bloggers (including myself). This current deal is as low as $3.95/mo depending on the plan you choose.
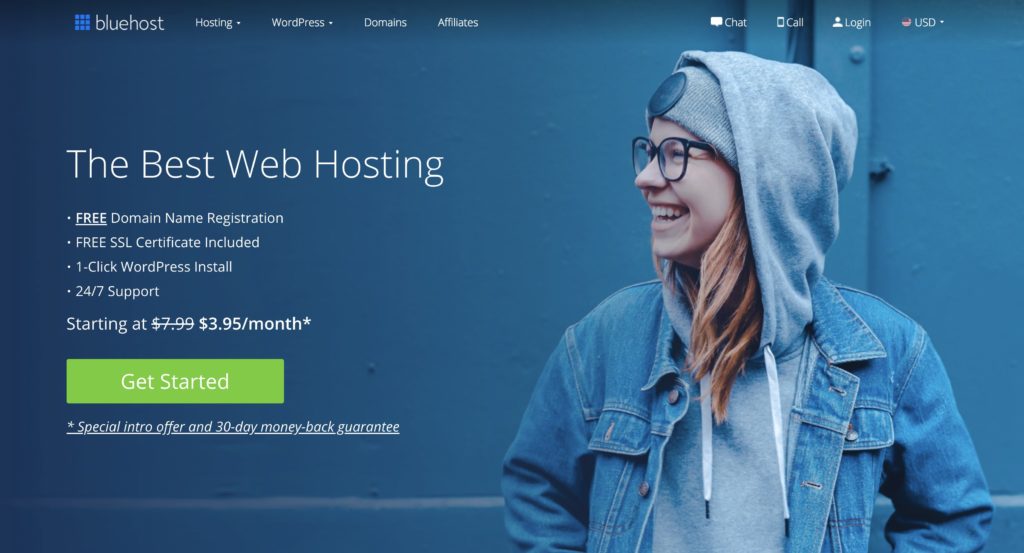
Select the “Get Started” GREEN button. There are 3 Choices for packages: Basic, Plus, and Choice Plus. If you are just starting out and you have limited resources, the basic plan will suit your needs just fine. But if you plan to have multiple sites in the future I would recommend you go with either “plus” or “choice plus”.
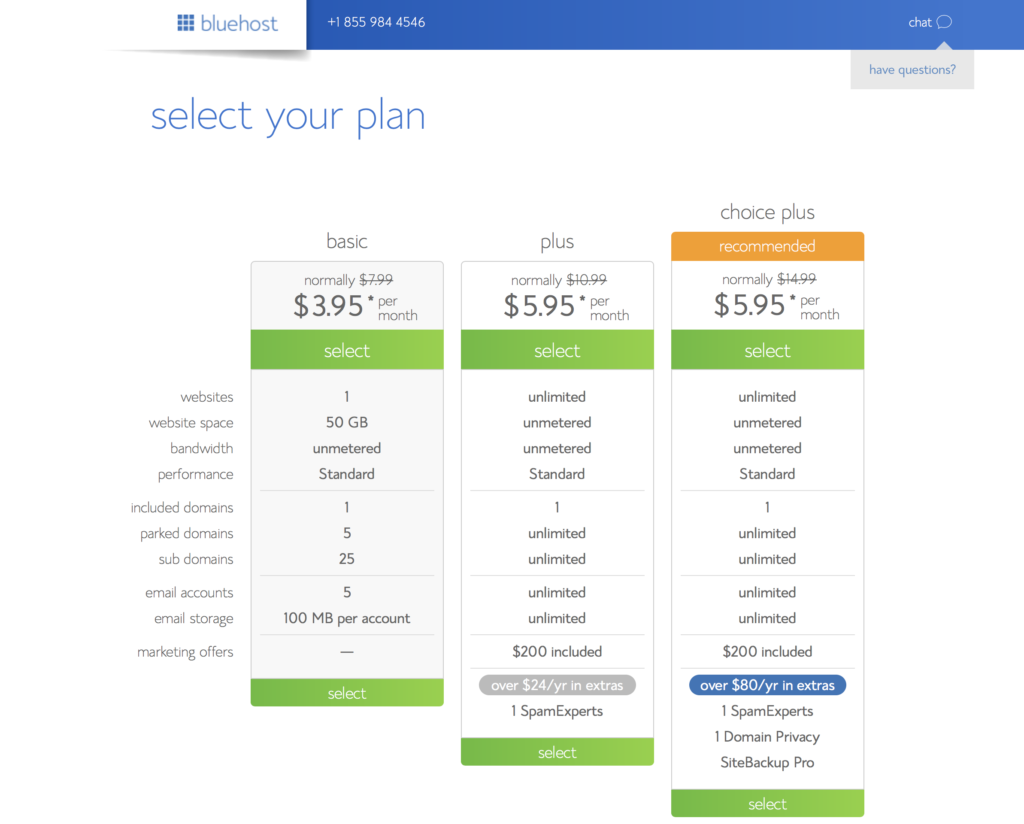
Click SELECT on your preferred plan to move to the next step.
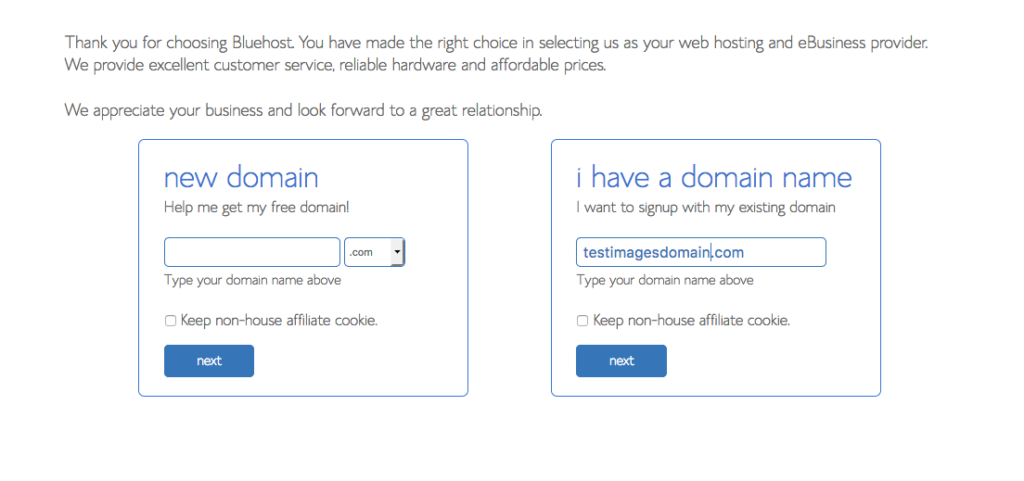
As you can see on the screenshot below, there are 2 options:
Create a new domain – If you do not already own a domain for your blog yet, enter in your preferred domain name in the box and click NEXT:
I have a domain name – If you already own a domain (probably registered somewhere else), then enter your domain name in the box and click NEXT:
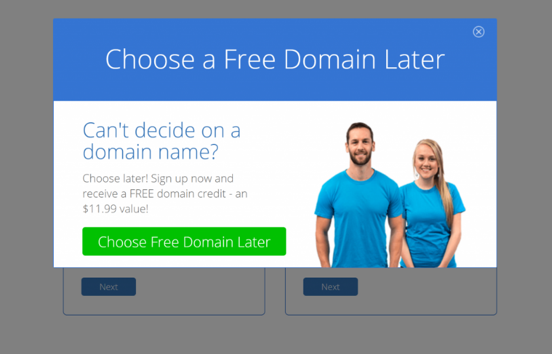
If you don’t have your domain name figured out yet, you can just select “Choose Free Domain Later” and proceed with the next steps.
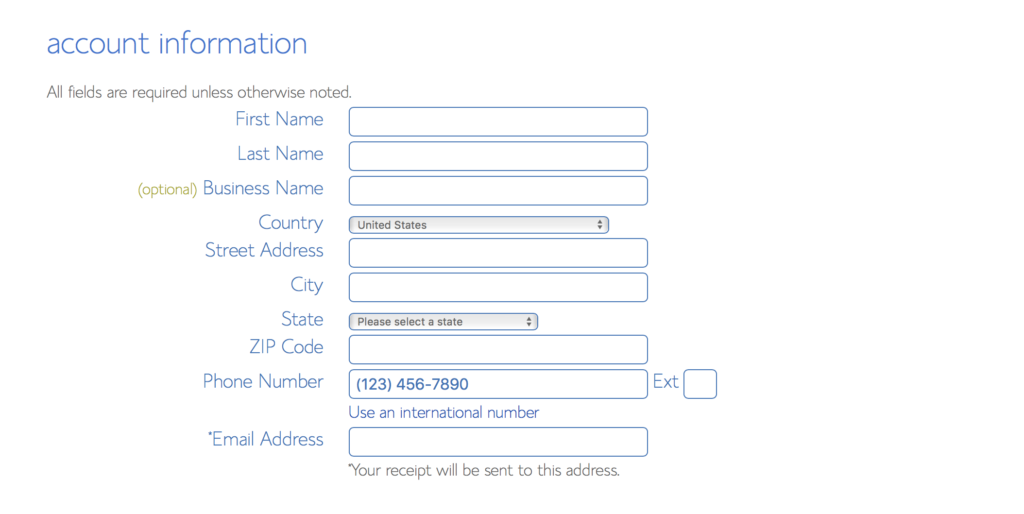
Once you decide on your domain and confirm that it is available, you will need to create your Bluehost Account. Enter your details by filling in your order information.
After you create your Bluehost account, you will need to select your account plan and any package extras. You can choose your account plan based on how far in advance you want to pay for your hosting. When I first purchased hosting for The Nerdy CEO, I selected the 36 month account plan. The longer the length of time you pay for upfront, the cheaper the monthly price will be.
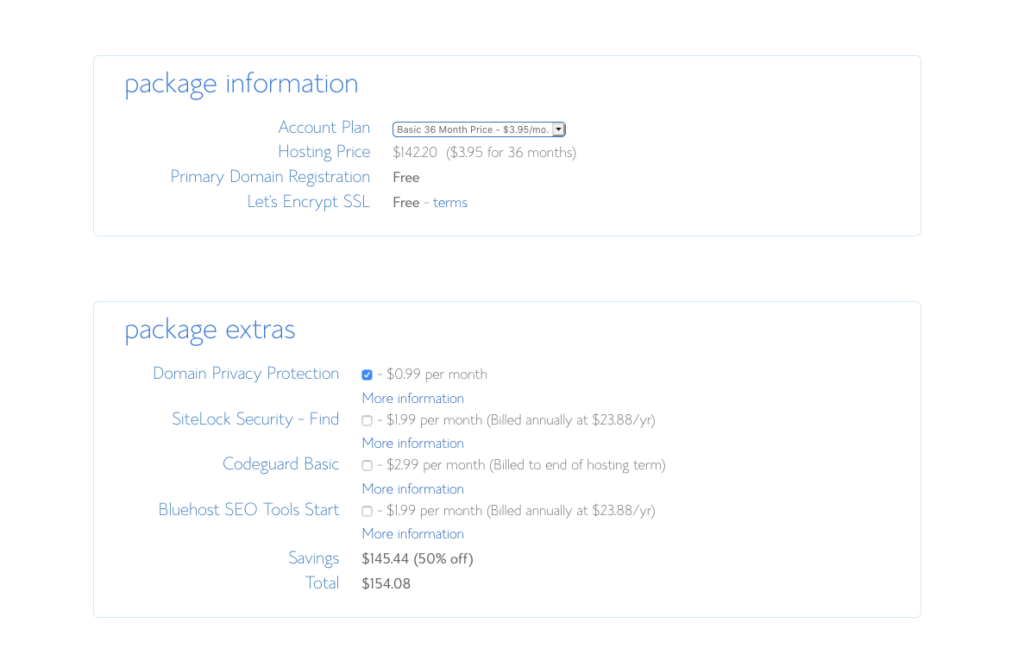
You don’t have to worry about selecting any of the package extras at this stage unless your plan doesn’t include Domain Privacy Protection. If your plan did not include this, I highly recommend that you purchase it as an add-on (so your name and contact information is not visible in the public domain registry).
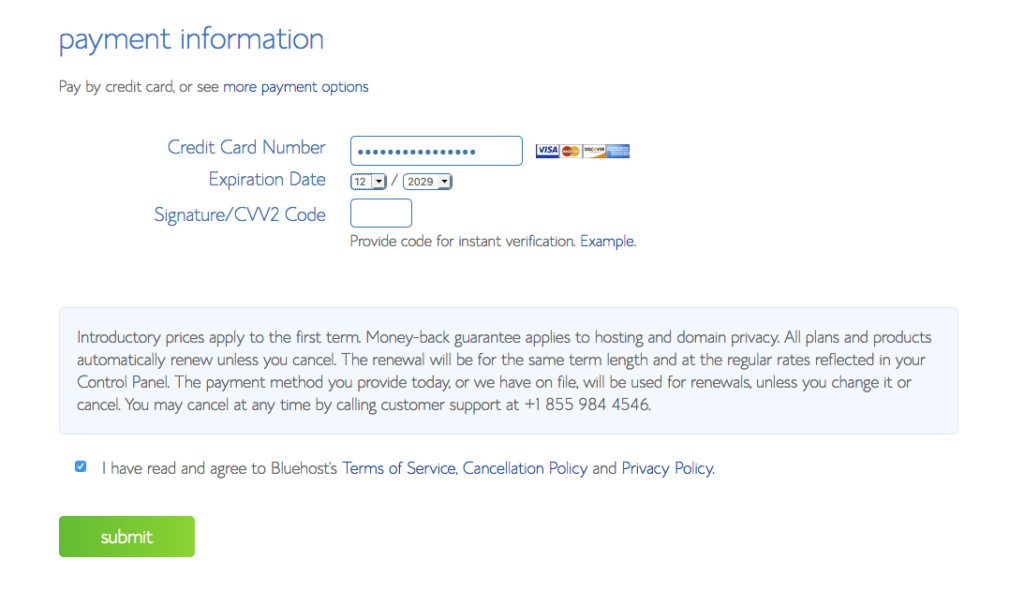
The next section is Payment Information. Enter your credit/debit card information to pay for your web hosting. Remember that this is the total amount that you will pay for hosting for the time period that you selected for your Account Plan.
Fill in your payment details, agree to the terms of service, and click “Submit”.
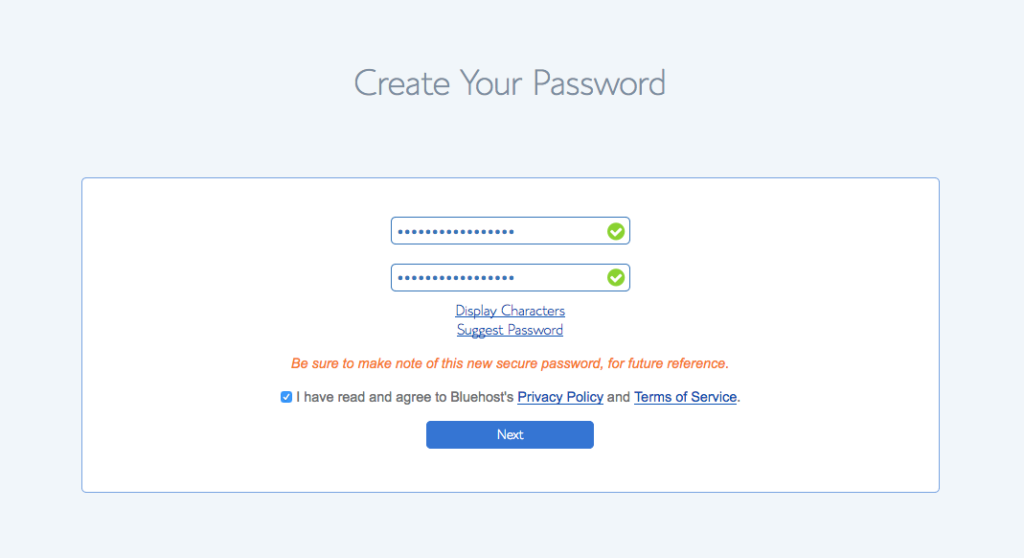
CONGRATULATIONS!!! You did it! You are now officially a blog owner. But you’re not quite done yet! The next step is to create a password for your new Bluehost account.
Enter your password in both boxes, then agree to the terms of service, and click “Next”.
Once you create your password, you’re ready to log in to your new Bluehost account and get started installing and setting up WordPress.
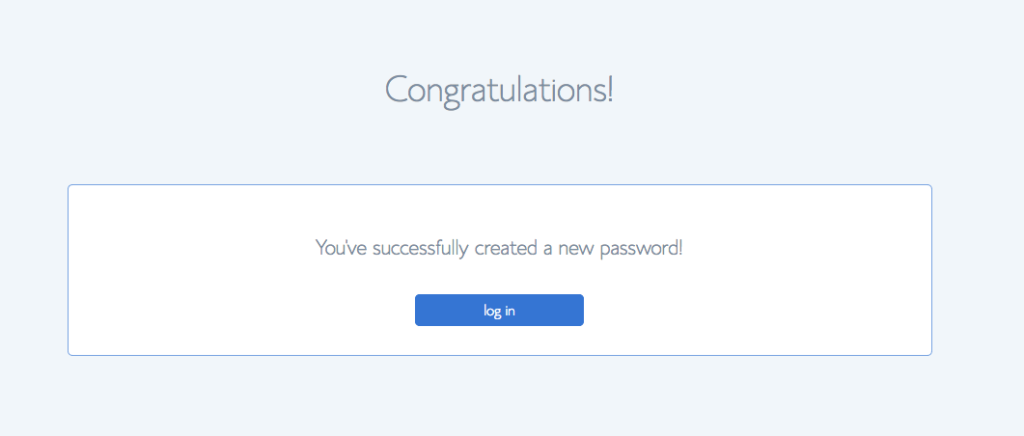
Click the blue “Log In” button and enter your account details and password to log in to your Bluehost Account.
By now you have already decided on a niche for your blog, picked a domain name, and setup hosting for your site. Now, it’s time to get started with WordPress.
Like any other software program, it takes a little time to become an expert at WordPress. But, have no fear, WordPress is a very straightforward software program that will start making sense to you in no time.
WordPress is a widely used Content Management System (CMS). It is basically the software that will allow you to create and manage your digital content. It is very popular, and it is used by a lot of websites and blogs on the internet. One of the best things about getting started with Bluehost is that it will automatically install WordPress for you. This makes it super easy to get your blog started.
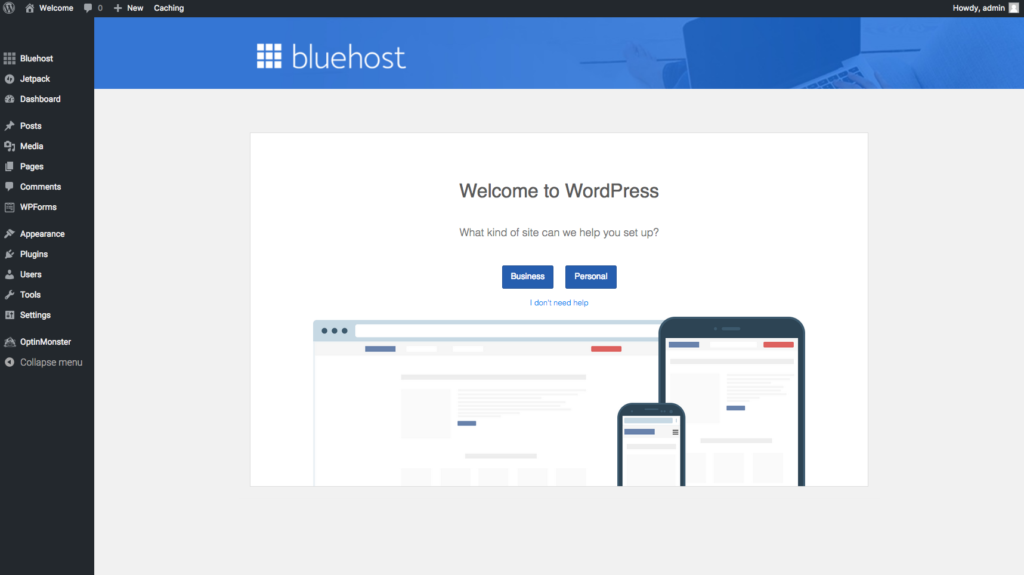
When you first log into WordPress, the dashboard may first appear to be daunting and confusing and you might find yourself getting overwhelmed with all of the options in the side bar. Spend some time clicking around to see the different sections. In reality, the layout is very simple and it will begin to make sense to you as you start playing around with it.
Here are some of the really important sections which can be found along the left hand menu:
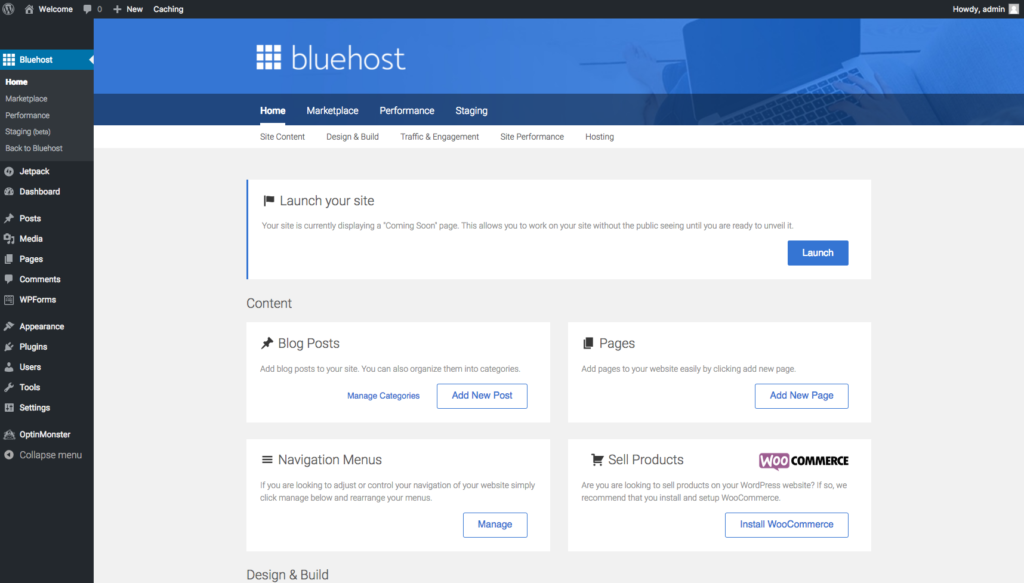
Look through all the sections first before you start making any changes. When you have a level of knowledge and understanding, begin customizing your blog….start in Settings, then move on to Appearance.
Important Note: Do NOT I repeat, do NOT go ahead and click the button to launch your site at this stage. You’re not quite ready yet and I recommend getting your blog more established and looking the way you want it to before launching. Launch only when you feel like your website is up to par.
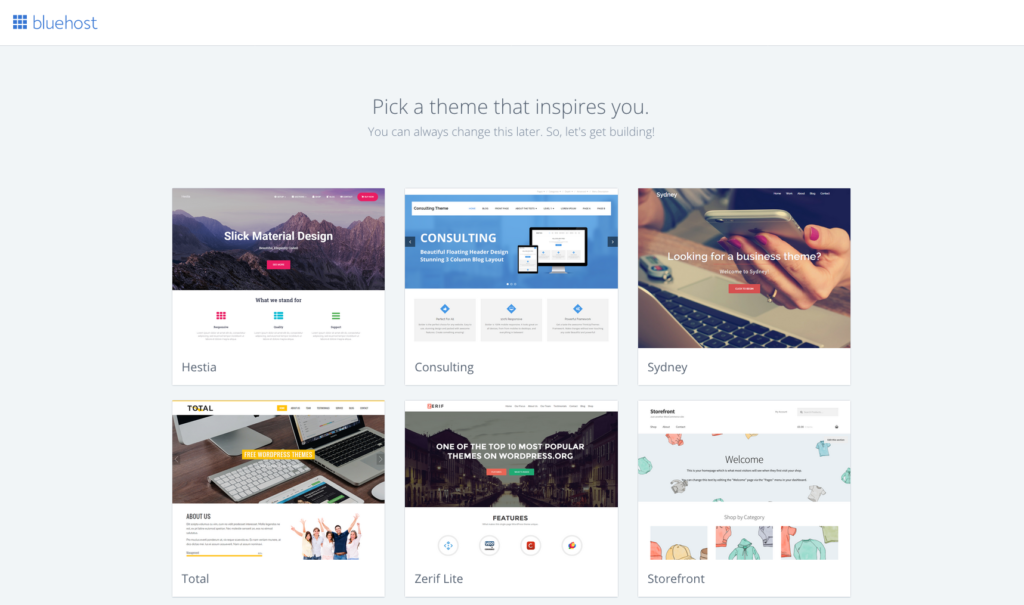
The next important thing I am going to cover is choosing a Theme. A theme is a template used to make your WordPress site look a certain way. The kind of theme you choose for your blog is part of what makes your blog stand out. A lot of readers will be first attracted to beautiful and eye catchy themes as well as pictures on your website. The theme you choose defines your blog in several ways.
Themes can be found on your site by going to the dashboard and clicking on Appearance, and then select Themes. There you will find a number of “Free” themes that are included with all WordPress installations. Some of the themes listed are pretty good, and may be good for getting your website started.
However, the disadvantage to free themes is that everyone that installs WordPress has access to these same themes. There may be many other sites out there that look like yours if you go this route. But, if you want your blog to stand out, I recommend purchasing a premium theme from a reliable source that offers ongoing support and updates to make sure that your theme remains up to date.
I purchased my very own theme with The Nerdy CEO from SparrowandSnow and I absolutely love it. I found their themes to be very unique, modern, and professionalthanks to its customizable settings: colors, fonts, layouts, and page configurations.
Now, this part should be fairly simple; but it may vary depending on which theme you choose. If you’ve selected a theme from a reputable provider, it should come with step by step instructions (some will even provide a video tutorial) to complete the installation as well as how to customize the design once it is installed.
To install your theme, all you need to do is:
Note: If you feel this task to be overwhelming, your theme supplier will also offer installation services for an additional fee.
You have to carefully select either a free theme or purchase a paid theme that will be very good for your blog. After you have done this, you are free to start building your blog by getting a logo and creating your main pages.
Once you’ve finished customizing your theme design, I recommend that you get a professional looking logo for your new blog. There are many places to go to get a great logo on the internet and there are many logo providers that will create you a logo for $5-$25. The fee varies depending on if you want a text based logo or a logo with a graphic image.
Look around and read the feedback. If you do have a bit of money left in your blog budget, you can find some lovely, reasonably priced logos from Fiverr, LogoScopic, or Ripl.
Or if you want to create your logo for free, there’s a free design website called Canva that is great for simple designs. I highly recommend it.
Yes! You have reached the final stage of your blog creation. After you have customized your blog to suit your taste, you can now go ahead and start creating content. This is where you get to start really digging into your chosen blog topic.
There are two main questions that usually come up here and they are:
Your first blog post should be something you will remember. Give it some thought. When you have a concept, just go with it. Make sure to tell a story in your post. You will build your audience by letting your personality shine through. Facts can be found anywhere, but presenting information in an informative and entertaining way will likely grow your following.
As with any content on your site, it doesn’t have to be perfect the first time it is published. It is very easy in WordPress to go back and revise posts or pages when you come up with new ideas. In fact, making changes and updates is looked upon favorably by Google and most readers.
Before you launch your blog, I recommend that you have some basic pages written and published. Some of these are necessary, while some are just nice to have. Your About Me page should be an easy one. Everyone loves talking about themselves. Tell everyone who you are and why you are starting this blog. If you have a particular background which qualifies you to be an expert on a subject, the place to toot your own horn is here J. Make sure you explain why you are doing this blog and also what makes you and it unique.
You should get started with the following pages:
It is good to have at least a couple of really great posts ready before you launch so that your potential readers don’t just find an empty site if they happen to stumble upon your blog.
Don’t get too stuck on everything being perfect and complete before you launch. While it’s important to look polished and eye-catching, you really don’t need a ton of content to launch.
As you are preparing to launch your brand new website, there are some additional tasks you should complete to make sure you’re fully operational and getting the traffic you need.
This step is very important for new sites. Before you launch, you should definitely sign up for Google Analytics and make sure it is correctly set up on your site.
Google analytics will allow you to monitor your traffic right from the start and will provide valuable insights into all aspects of your blog traffic. You definitely want to be paying attention to this once you launch so that you can find your audience quicker and start increasing your page views.
Another important step that you should do before launching your blog is to set up an email account for your domain name.
This will allow you to have a specific email address for your domain, should subscribers want to contact you. For example, mine is hello@thenerdyceo.com.
I actually set my domain email address up through Bluehost. There are lots of good tutorials available to help you get set up. I recommend taking a look at this tutorial over at: https://my.bluehost.com/hosting/help/newemail.
Above I mentioned that you should set-up your domain email address and once you have that, you should set up your email list. One of the most important things you can do as a blogger is to establish an email list right from the start using an email service provider. Most established bloggers always talk about how they wish they had done it sooner.
This is where you will create all your emails that you send to your subscribers. For example, automated welcome and thank you emails and newsletters. You’ll use your email list to build the know, trust and like factor with your audience and nurture them into becoming buyers if you are selling your own products on your blog. Email marketing will play a big role in being profitable with your blog.
Social media accounts play an important role in creating exposure for you and your blog content. In fact, some sponsors will pay for posts on your social media accounts if you can get a good following.
Do keep in mind that not all social media platforms will be applicable to your blog. A smart approach is to focus on growth of just 1-2 social media channels at a time. Pick whichever platform you feel like is the best fit for your message and your audience, as well as for your personality.
When you are setting up social media accounts, try using the same name as your site name. If it’s not available, pick something as close as possible. When that account is set up, share it in your personal profile(s) and invite your family and friends to like your page. Again tell everyone about your new blog and many will be interested in following you over there. For most of your social profiles, you will need to upload some cover graphics and/or a cover picture. If you have a logo, you can certainly use that.
One last thing that I recommend you do before launching your blog is to install and set up some basic plugins. There are tons of plugins available, both paid and free.
To find the plugins page, go back to your WordPress dashboard again and find “Plugins” on your left sidebar. Then select “Add New”. Once you’re here you can search for your desired plugins. You’ll have to download the plugins you want and then activate them before you will be able to change the settings or use them.
For new bloggers just getting started, I recommend the following free plugins:
√Yoast SEO – This plugin is essential for helping you improve your post readability and ensure that your posts and pages are search engine optimized. This will mean that your posts have a better chance of ranking well in the Google search results in the future.
√Akismet – Helps block spam comments on your blog.
√MonsterInsights – This is a great plugin for Google Analytics. It will allow you to easily view your site stats once you get started.
Are you overloaded yet? Whooooo!!!! You should give yourself a pat on the back, if you’ve made this far. Because this is the moment you’ve been waiting for……..You’re ready to LAUNCH!!!
CONGRATULATIONS!!!
If you’ve followed all of the steps up to this point, you should have an eye catching blog set up the correct way.
The last thing you need to do to “go live” is to actually launch your blog.
To launch your blog, just follow these simple steps:
Now that you’ve successfully created and launched your new blog, there are so many different things you can do to continue improving and growing your audience. Make sure that you continue to post great content and be consistent about it. Consistency is key. You may not start earning from your blog right away, but the most important thing is to never give up. I will later write a post about different ways to help monetize your blog so be on the lookout for that.
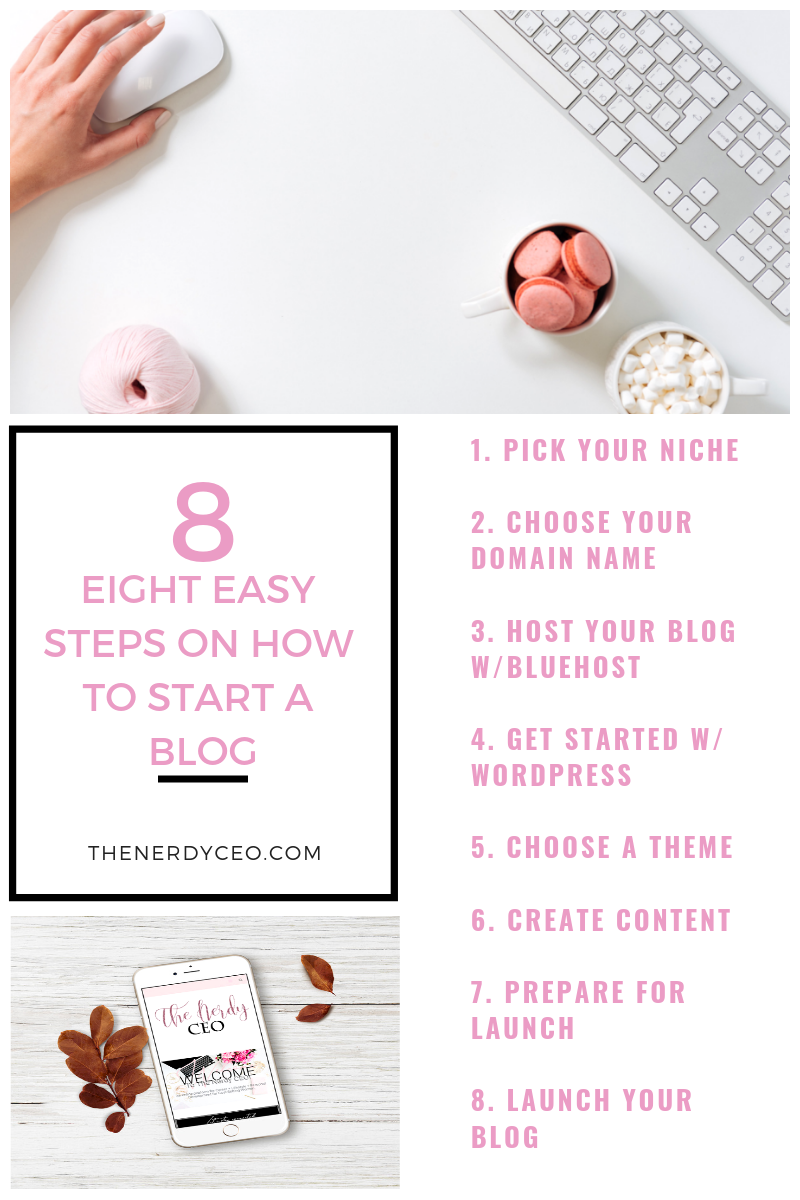
There you have it. I have given you 8 different step you can use to start and own a successful blog in 2019. As I mentioned earlier, it will require some work on your end, but the most important thing is to get started. So, grab your laptop, or any gadget you intend using to start your blog, go over to BlueHost, sign up, and get started.
If you found this guide helpful, I’d love it if you would spread the word. Share on social media to help others get started too. 🙂
Xo!
As you are preparing to launch your brand new website, there are some additional tasks you should complete to make sure you’re fully operational and getting the traffic you need.
This step is very important for new sites. Before you launch, you should definitely sign up for Google Analytics and make sure it is correctly set up on your site.
Google analytics will allow you to monitor your traffic right from the start and will provide valuable insights into all aspects of your blog traffic. You definitely want to be paying attention to this once you launch so that you can find your audience quicker and start increasing your page views.
Another important step that you should do before launching your blog is to set up an email account for your domain name.
This will allow you to have a specific email address for your domain, should subscribers want to contact you. For example, mine is hello@thenerdyceo.com.
I actually set my domain email address up through Bluehost. There are lots of good tutorials available to help you get set up. I recommend taking a look at this tutorial over at: https://my.bluehost.com/hosting/help/newemail.
Above I mentioned that you should set-up your domain email address and once you have that, you should set up your email list. One of the most important things you can do as a blogger is to establish an email list right from the start using an email service provider. Most established bloggers always talk about how they wish they had done it sooner.
This is where you will create all your emails that you send to your subscribers. For example, automated welcome and thank you emails and newsletters. You’ll use your email list to build the know, trust and like factor with your audience and nurture them into becoming buyers if you are selling your own products on your blog. Email marketing will play a big role in being profitable with your blog.
Social media accounts play an important role in creating exposure for you and your blog content. In fact, some sponsors will pay for posts on your social media accounts if you can get a good following.
Do keep in mind that not all social media platforms will be applicable to your blog. A smart approach is to focus on growth of just 1-2 social media channels at a time. Pick whichever platform you feel like is the best fit for your message and your audience, as well as for your personality.
When you are setting up social media accounts, try using the same name as your site name. If it’s not available, pick something as close as possible. When that account is set up, share it in your personal profile(s) and invite your family and friends to like your page. Again tell everyone about your new blog and many will be interested in following you over there. For most of your social profiles, you will need to upload some cover graphics and/or a cover picture. If you have a logo, you can certainly use that.
One last thing that I recommend you do before launching your blog is to install and set up some basic plugins. There are tons of plugins available, both paid and free.
To find the plugins page, go back to your WordPress dashboard again and find “Plugins” on your left sidebar. Then select “Add New”. Once you’re here you can search for your desired plugins. You’ll have to download the plugins you want and then activate them before you will be able to change the settings or use them.
For new bloggers just getting started, I recommend the following free plugins:
√Yoast SEO – This plugin is essential for helping you improve your post readability and ensure that your posts and pages are search engine optimized. This will mean that your posts have a better chance of ranking well in the Google search results in the future.
√Akismet – Helps block spam comments on your blog.
√MonsterInsights – This is a great plugin for Google Analytics. It will allow you to easily view your site stats once you get started.
Are you overloaded yet? Whooooo!!!! You should give yourself a pat on the back, if you’ve made this far. Because this is the moment you’ve been waiting for……..You’re ready to LAUNCH!!!
CONGRATULATIONS!!!
If you’ve followed all of the steps up to this point, you should have an eye catching blog set up the correct way.
The last thing you need to do to “go live” is to actually launch your blog.
To launch your blog, just follow these simple steps:
Now that you’ve successfully created and launched your new blog, there are so many different things you can do to continue improving and growing your audience. Make sure that you continue to post great content and be consistent about it. Consistency is key. You may not start earning from your blog right away, but the most important thing is to never give up. I will later write a post about different ways to help monetize your blog so be on the lookout for that.
There you have it. I have given you 8 different step you can use to start and own a successful blog in 2019. As I mentioned earlier, it will require some work on your end, but the most important thing is to get started. So, grab your laptop, or any gadget you intend using to start your blog, go over to BlueHost, sign up, and get started.
If you found this guide helpful, I’d love it if you would spread the word. Share on social media to help others get started too 🙂.
Xo!
 Loading...